Showing posts with label Recipe. Show all posts

Monday, December 17, 2012

homemade gluten free samoas

Samoas (aka Caramel deLites in some regions) were always my favorite Girl Scout cookie to buy.  Since they don't make a gluten-free version, I've missed the chocolaty caramel coconut goodness for just over 3 years now.  Finally, I decided to try to make them myself, and they're freaking awesome.  This recipe was adapted from spabettie.  

Shortbread cookie dough:

  • 1 cup butter (2 sticks)
  • 1/4 cup sugar
  • 1 tablespoon vanilla extract
  • 2 cups gluten free all purpose flour
  • 1/4 cup coconut milk

Cream together the butter, sugar, and vanilla.

Mix in flour 1/2 cup at a time, adding milk a little at a time.

Knead into a ball and cool in refrigerator for 10 minutes. (An hour will make the dough too cold!) 
Roll out the dough to 1/4 to 1/3 inch thickness and cut into circle shapes.  I used a glass about 2 inches diameter and a 1 inch cookie cutter for the center.  (If you do cut out a center, you'll get more cookies.  If you don't, you get bigger ones!  I made some of each.) 


Bake at 350° for 12-15 minutes. Keep in mind that, since there is no egg, they won’t brown much.  The surface will crack a little when they’re ready.
Cool completely. 


Caramel coconut topping – I wanted thick caramel on each cookie, so I ended up doubling this.

  • 1 cup shredded coconut
  • 1/2 cup brown sugar
  • 1 tablespoon water
  • 1/4 cup coconut milk
  • 1 teaspoon cornstarch
  • 3 tablespoons butter

Spread coconut in a layer on prepared baking sheet and bake at 350° for 3-4 minutes at a time. 
Stir and repeat until the coconut is golden brown.  I baked mine for about 10 minutes total. 

In a saucepan over medium heat, combine sugar, cornstarch, water, and milk, stirring until the sugar is dissolved and the mixture begins to thicken.

Remove from heat.

Add the toasted coconut.

The mixture will thicken more as it cools.  If it’s too runny, add more coconut.  Otherwise, it will ooze off of your cookies, leaving only the tiniest bits of coconut.


Chocolate sauce:

  • Dark chocolate – Keep in mind that morsels are coated to retain their shape.  I used most of a giant 6.8 ounce Hershey’s Special Dark bar. 
  • 2 tablespoons of butter – You can add more to thin the chocolate.

Melt over low heat, stirring very frequently to avoid burning the chocolate.


Putting it all together:

Spread the topping on the cookies.  If it’s too thick, I found the best thing is spreading the goop by hand.
Using a big whisk, I spread the chocolate on the cookies in 3-4 stripes.  (A fork was way too small and tedious.)
Using a pastry brush, coat the bottom of each cookie in dark chocolate and allow to dry on parchment paper.  (Reheat as needed, since it thickens as it cools.)

Chill to cool completely and ENJOY!!

Sunday, November 25, 2012

peppermint brownie-cakes

Last night I made these peppermint brownie cupcakes.  They're so simple and got audible yum sounds :) 

I started with:
  • A boxed brownie mix -- I personally prefer either Betty Crocker Gluten Free Brownies or King Arthur Gluten Free Brownies.  This was made with the latter. 
  • 1/4 cup (4 tablespoons) melted butter
  • 3 large eggs -- I used my parents' duck eggs
  • Mini peppermint patties 
  • Chocolate chips or chocolate syrup -- I'll explain in Step 7 :)
  • 2-3 crushed candy canes
1. Preheat the oven to 350 degrees and place cupcake wrappers in a muffin pan - either regular or mini in size.  I used both, just to test it out.  They both work.

2. In a medium bowl, stir the mix with the melted butter and eggs. 

3. Divide the batter between cupcake cups, leaving more room in the cup than you normally would.  Tip: Use an ice cream scoop to measure the batter.

4. Place an unwrapped peppermint patty on top of the batter and press it down about halfway into the cup.  If it's too near the top, the peppermint patty will puff out.  If it's on the bottom, the peppermint filling with stick to the bottom of the wrapper. 
 5. Bake 18-22 minutes if making full-size cupcakes.  I baked my minis for about 15 minutes.
6. Cool completely on a cooling rack for roughly an hour. 

7. Melt the chocolate chips in a double boiler.  I've heard the microwave for 1 minute will work, but my chips only became grainy, and I didn't have the time for a double boiler.  In a hurry, I turned to chocolate syrup, which doesn't harden the way I wanted. 

8. Drizzle the chocolate over the cupcakes and sprinkle with the crunched-up candy canes.


Happy eating!

Saturday, November 24, 2012

pumpkin cake pops

Hello, readers!  I hope you each had a wonderful Thanksgiving with few (preferably no!) cross-contamination "oops" moments.

If you're not already pumpkined out - which tends to happen to most people at some point this time of year - here's a baked goodie that was a big hit at our Thanksgiving extravaganza on Thursday: gluten free pumpkin cake pops.  (Thanks to my boyfriend's mom, Jenny!)
First, Jenny combined a can of Libby's pumpkin, pumpkin pie spices, and a box of Betty Crocker Gluten Free Yellow Cake Mix, and bake the cake according to the box directions.

Cool then crumble the cake:
Add cream cheese frosting to make the crumblies hold together:
Form balls of cake:
 Shove sticks into the balls for dipping while melting white chocolate:
Dip into the melted chocolate & roll in chopped nuts.  Tada!!
P.S. These are also really tasty sans chocolate & nuts. 

BTW, you'll soon be enjoying higher-quality photos thanks to an early Christmas present from Scott: a Nikon Coolpix L310 with a special food setting :)

Happy eating!

Tuesday, November 20, 2012

thanksgiving recipe roundup: veggies, dip, & desserts

Hello!  My month got away from me, between my birthday and the election.  To make it up to you, here are a few recipes and tips worthy of Thanksgiving: a festive veggie plate, chip dip, tiramisu, and chocolate chip cheesecake. 

Here are tips from the National Foundation for Celiac Awareness from 2011 and from NFCA staff, bloggers, and Facebook fans for this year.  

Most importantly: don't let yourself feel like a bother.  It's common to feel guilty about your dietary needs and try to compensate by making "normal" versions of the same foods.  If you don't give a choice or make a big deal that yours is different, your guests probably won't think about it :)  This is so simple, but it's what I'm worst at doing.

Now, on to the recipes! 

Veggie Plate

 
Here I used baby carrots; red, green, yellow, and orange bell peppers; celery under the peppers; cucumbers.  Most important: the celery feet and pepper face.  Yep, I totally snagged this from Pinterest. I served it with Marzetti Simply Dressed Ranch. 

Addictive Chip Dip with Rotel, Cream Cheese, and Sausage

Scott's mom recently made this for a little shindig, and it was awesome.  I easily ate half of it myself -- and it's so simple to make!!
  • 2 8-ounce packages cream cheese 
  • 1 16-ounce package of sausage
  • 2 cans of Rotel (diced tomatoes and green chiles)
  1. I found that the store brand was the only one without MSG, but any will do, and I choose mild rather than medium.  That was plenty warm enough for me!
  2. Brown the sausage, and remove excess grease.  
  3. Add the cans of Rotel.  Some recipes suggest draining the Rotel, but I prefer to let the flavors merry in the skillet.  
  4. Let the liquid cook down, then add the cream cheese.  
Little tip: If you're like me and I only picked up one package of cream cheese, sour cream will do in a pinch.  I was more than skeptical!  Believe it or not, it doesn't impact the taste. 


Tiramisu

Using Schar Ladyfingers, I made some terrific tiramisu for Halloween & my birthday. 
  • 3 large eggs, separated 
  • 4 tablespoons sugar 
  • 8 oz of mascarpone cheese - I found a tiramisu flavored one that was incredible! 
  • 2 tablespoons rum 
  • 1 package gluten-free Schar Ladyfingers 
  • 1-1/4 cups of brewed espresso 
  • 2 tablespoons cocoa powder - I couldn't find mine and used homemade hot chocolate mix instead.  Mmm!
  1. Beat the four egg yolks with the sugar, rum, and mascarpone.
  2. Beat the egg whites until stiff.  Use a mixer!  Your arm will get tired mixing by hand.   
  3. Fold the egg yolks and cheese blend in with the egg whites.  
  4. Soak the ladyfingers in the coffee.  Don't use too much coffee!  Sadly I learned the hard way that it will make the ladyfingers very mushy.  
  5. Make a layer of ladyfingers in a glass dish, then spread the mixture on it.  Repeat :)
  6. When finished, sprinkle cocoa powder on top. 
Little tip: With egg whites, stiff peaks hold their shape while soft peaks will flop over.  

Chocolate Chip Cheesecake

A sweet friend made this for me for a Thanksgiving party over the weekend. Yum!  (Thank you, Katie!!)

  • Chocolate chip cookie mix for the crust - Our friend used the Betty Crocker Gluten Free Chocolate Chip Mix, which called for butter, vanilla, and egg.
  • 3 8-ounce packages of cream cheese
  • 1-1/4 cup sugar
  • 2 teaspoons vanilla
  • 4 eggs
  • 1/2 cup mini chocolate chips
  1. Preheat oven to 325.
  2. For the crust, make as directed then press in the bottom of the pie plate.  Set aside.
  3. Beat the cream cheese and sugar in a large bowl on low for 30 seconds.  
  4. Mix in vanilla and eggs.  
  5. Stir in chocolate chips, then pour into the pie plate on top of the cookie crust.
  6. Bake for 1 hour to 1-1/4 hours.  The cheesecake will be puffed and light brown.
  7. Allow the cake to rest in the oven for 15 minutes.  (The oven should be off with the door ajar.)
  8. Remove from oven, enjoy, and refrigerate any leftovers!

More to come tomorrow, including gluten-free pumpkin cake pops. Yeah, they're delish.  Happy eating!! 

Wednesday, July 25, 2012

chocolate-ancho chili flourless mini cupcakes

 Shown here: Chocolate & Ancho Chili Flourless Mini Cupcakes

Hello, and happy summer!  It's obvious that I've been more than a little busy the past few months.  Ask me what I've been up to, and I'll probably give you a blank stare.  It's been full of Reds games, the FBI Citizens' Academy, my boyfriend's annual training with the National Guard, the World Choir Games and the Big Pig Gig: Do Re Wee, Zumba for the Wii, and more gluten free treats.

For Cinci de Mayo, I made these chocolate and ancho chili flourless mini cupakes, doing some slight modifications to a recipe from Emeril Lagasse.

Ingredients:
  • 2 sticks of butter
  • 8 ounces of bittersweet chocolate, chopped
    Note: Chocolate chips are not designed to melt; so that they stand up in cookie recipes, they have a coating on them that makes them not melt as uniformly as chopped chocolate.  There are six terrific tips over at giver'slog.   
  • 1/4 cup unsweetened cocoa powder, sifted (plus some for dusting the finished cupcakes)
  • 3 tablespoons ancho chili powder
    It sounds like a lot, but it really is not overpowering.  I was skittish, too.
  • 1/4 teaspoon salt
  • 6 duck eggs, separated
    You're welcome to use large chicken eggs.  My parents have ducks, and using their eggs creates a loftier finished product - a desirable trait in a gluten free goodie. 
    If "separating" eggs is foreign to you, check out this photo-essay on Simply Recipes.
  • 1 cup sugar
  • 1 cup heavy cream
  • 2 tablespoons confectioner's sugar (AKA powdered sugar)
  • Pinch ground cinnamon

Preheat the oven to 350 degrees F.
Place the mini cupcakes cup in the tin. 

In the top of a double boiler, melt the chocolate and butter over medium-low heat.
When a recipe calls for a double boiler, you can improvise but can rarely substitute something else.  If you don't have an official double boiler, you can use a saucepan and a large bowl.  Water will be boiled in the saucepan, and the bowl will be set in the pan but should not touch the water.  The chocolate pieces go in that bowl.
Once melted, remove from the heat and whisk in the cocoa, chili powder, and salt.

In another bowl, whisk together the egg yolks with 1/2 cup of the sugar until thick and pale yellow in color.
Fold the chocolate mixture into the yolks and mix well.

In a third bowl, you'll make the frosting.  Whisk the egg whites until thick.
While whisking, add the remaining 1/2 cup sugar gradually and continue to beat to form a light meringue.
You'll have a meringue when peaks begin to form.  I see them as little mountains in the snow.  
In several additions, fold into the chocolate mixture, being careful not to deflate the meringue.
Gently pour the chocolate mixture into the prepared cups.
I use an ice cream scoop to measure even portions.
Bake until the edges are set but the center is still moist, about 30 minutes.  It should pass the toothpick test.

Remove from the oven and cool completely in the pan on a wire rack.


In a bowl, beat the frosting mixture with an electric mixer until frothy.
Add the confectioners' sugar and cinnamon and continue to beat until the cream holds soft peaks.

To serve, dollop a portion of the sweetened whipped cream and garnish with cocoa powder.

Yum!  Happy eating :)

Friday, February 17, 2012

gluten free cheesesticks

Hello, Gluten Free World!  I really haven't forgotten about you.  It's been quite a hectic month.  The boyfriend had a spot of skin cancer removed that ended up being a bit larger than anticipated, the family's 20-year-old cat had to be put to sleep due to malignant tumors, I started an anatomy & physiology course (while still working 45 hours a week), and my wisdom teeth were removed yesterday.  Woohoo!

For Valentine's Day, the boyfriend went all out.  I hadn't eaten a cheesestick in 2 1/2 years.  When I got home from work, he surprised me with some :)
 It was AWESOME!!  They were part of a wonderful dinner: mini salad bar, grilled steak, grilled asparagus, green beans, and tater tots.  Mmm.  That morning, he'd surprised me by decorating our bathroom:
So on Wednesday, he helped me make more cheesesticks.  This recipe is his own creation, so you're welcome to make variations as needed.

Ingredients:
  • Udi's bread 
  • 1 T parsley
  • 1 T salt
  • 1 T garlic powder
  • Mozzarella cheesesticks
  • 2 eggs 
  • Canola oil - about 3 inches deep in a saucepan
  • Spring roll wrappers - We found some that are gluten free in our neighborhood Kroger
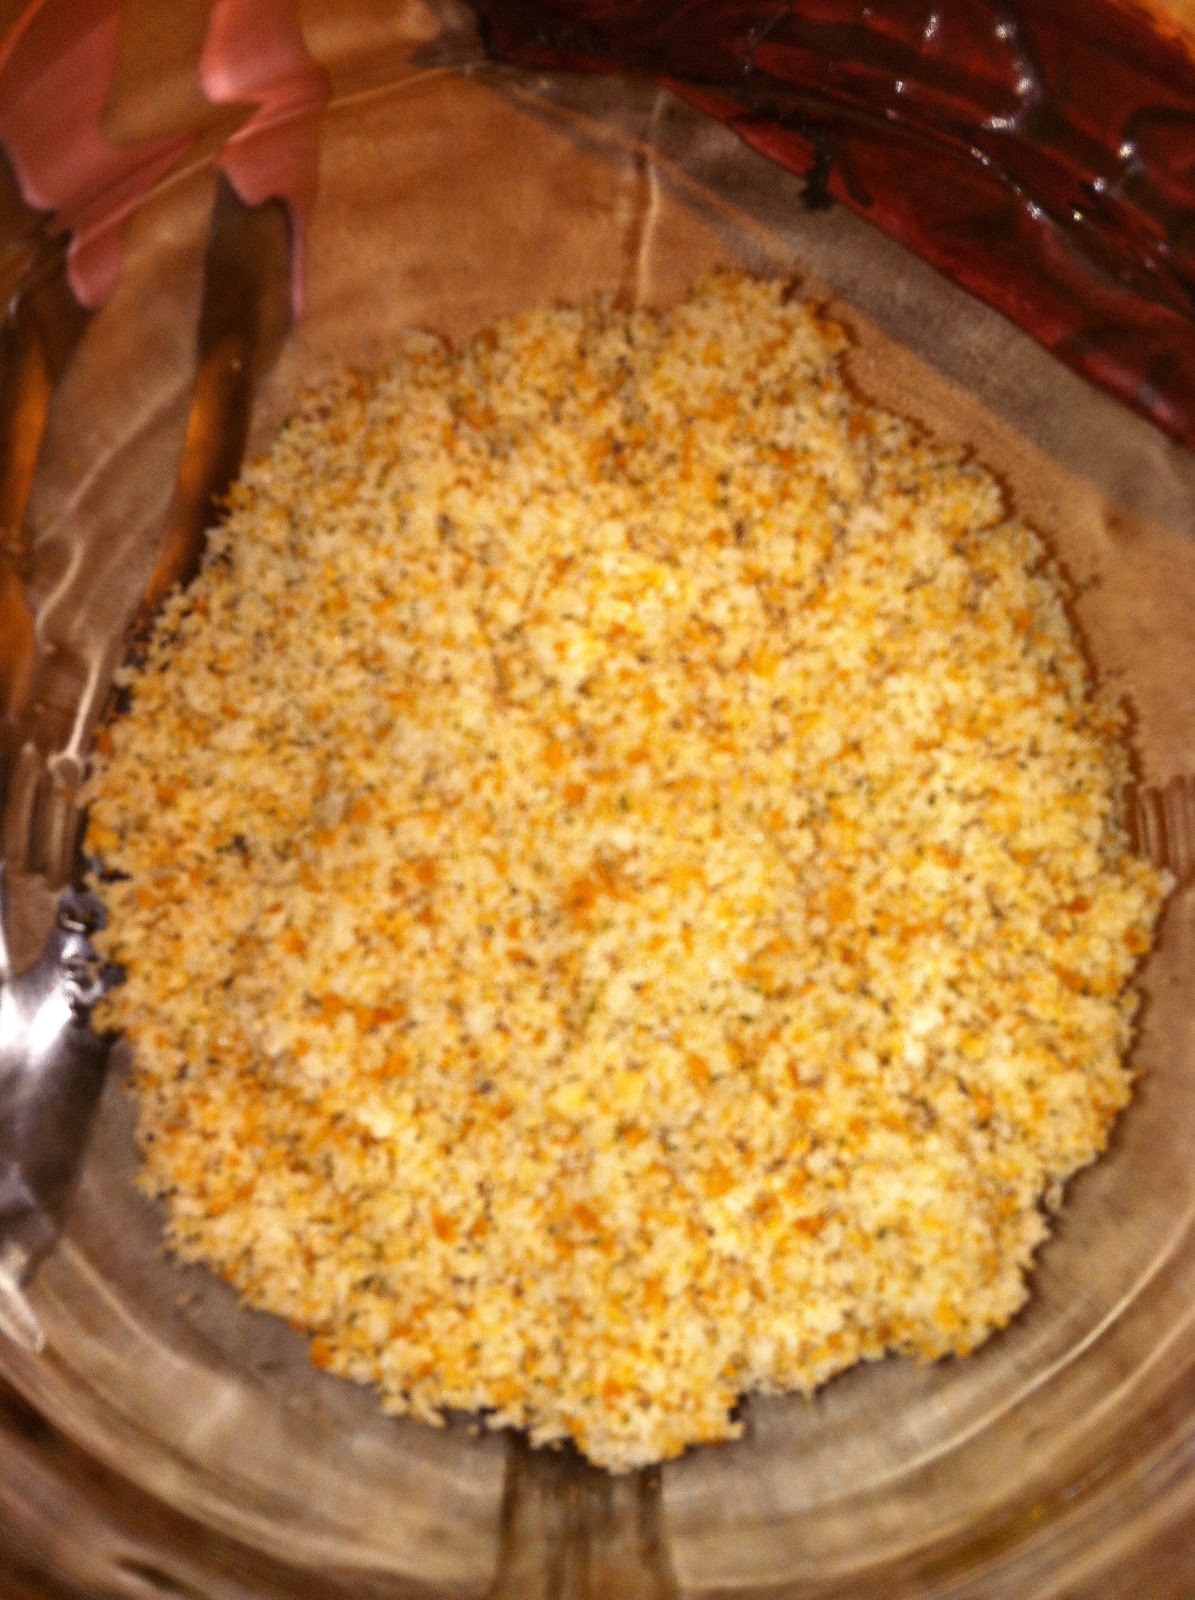
Chop the bread in a food processor.  Add the parsley, salt, and garlic powder.
 Slice the cheesesticks in half.  With the first run, Scott froze the cheesesticks for about 45 minutes prior to cooking.  On Wednesday, he didn't.  They both turned out very well.
Heat the oil as you whisk the eggs together.

Here we used 1 of my parents' farm fresh Speckled Sussex eggs (top) and a store bought egg (bottom).  You can see the difference in color between the two.  The yolk of a farm-fresh egg is more firm and well-defined. 
Cut the spring roll wrappers in half, dip in water, and wrap a cheesestick in it.  
The spring roll wrappers will become soft and can be clipped to size.  Roll the wrapped cheesestick in the egg wash and cover - no, smother - in breadcrumbs.  Smoosh the breadcrumbs onto the cheesestick.

With the oil at about 365 degrees, drop in the cheesestick.  It will cook quickly, less than 2 minutes.  Judge it by the color & texture of the breadcrumbs.  (If the temperature is too high, the crumbs will cook but the cheese will remain room temperature.)
 Yummy!!!  This breading was absolutely terrific. 

Enjoy :)  And if you have a variation you'd suggest, please let me know!  Happy eating!

Monday, January 30, 2012

beef & broccoli stir fry

Before I was diagnosed with a gluten intolerance, my former roommate & I came up with an awesome chicken & broccoli recipe.  It was drool worthy.  Since the diagnosis, I still haven't been able to quite perfect that recipe, but tonight I took a chance on gluten free beef & broccoli.  An added twist: my boyfriend isn't into my soy sauce of choice, San-J Tamari.  Another added twist: I picked up a bottle of San-J Gluten Free Teriyaki a couple weeks ago, not realizing it has my other nemesis, ginger. 
Tonight's variation included:
  • 3 tablespoons Lea & Perrin's Original Worcestershire Sauce (gluten free)
  • 1 tablespoon San-J Tamari
  • 1/2 tablespoon rice wine vinegar
  • 1/2 tablespoon butter
  • 1/4 tablespoon minced garlic
  • salt to taste
  • pepper to taste
  • 1 pound beef for stir fry
  • (roughly) 2 tablespoons corn starch
  • rice 
  • broccoli or other veggies

  • In a 10 inch skillet, mix the first 7 ingredients and heat, stirring occasionally.  
  • Once hot, add the steak.  
  • Steak in a not-so-hot skillet will cook too slowly and may stick.  
  • Stir fry!  
  • Depending how you like your broccoli (or other veggies), you can add it now or after the sauce is done.  (Scott doesn't like broccoli, so I cooked it separately and stirred it into my own dish.)
  • Once cooked to your desired temperature, add the corn starch and stir well.  This thickens the sauce. 
  • Prep the rice.  I used minute rice.
  • Done!

Scott's one suggestion for improvement: more sauce!  Next time, I'll double - at least - the sauce recipe.  This has a nice spiciness, and it had something that reminded Scott of Skyline Chili.  (Random: Skyline has a gluten free menu.)

In other news, today I started a Facebook page and Pinterest.  Hello new addictions!  I've already gotten several great ideas for variations to make recipes gluten free and have had a few items repinned.

Happy eating!!

Thursday, January 26, 2012

microwaves, corn on the cob, & artichokes

This might shock some of my friends, but I didn't really grow up with a microwave.  Sure, we had one, but we only used it for popcorn and maybe edamame.  I was (and still am) continuously warned to keep my distance from it.  Search 1960s microwave and this pops up as one of the image options:

That's pretty much dead-on.   Add to it the fact that, in my most recent food service experience, there wasn't a microwave in the place. 

So even now in my mid-to-late twenties, I'm fascinated by microwaves.  Sometimes I feel like a child who's just been given permission to use one and doesn't know what to do with this newfound power.  I don't know how often in a month I say, "Whoa, you can heat that in the microwave?!"  Frequently that's followed by someone instructing me, "Sure, just hit the ___ button!"  The stove top and oven are my preferred methods, but wow, the convenience astounds me.  It's the little things in life. 

On to corn...  A nice gentleman from Brown's Family Farm Market who set up at the Fountain Square Farmers Market showed me last year how to microwave corn on the cob.  Since it's quicker and not boiling in water, the vegetable is able to keep more of the nutrients that would otherwise seep into the water in the pan.  

To microwave corn on the cob:
  • Shuck the corn and discard the husk.
  • Wrap the corn in a damp paper towel.
  • For one ear, cook 1 1/2 to 2 minutes.  2 ears, 3 to 4 minutes.  3 ears, 5 to 6 minutes.  And so on.  
  • It will be hot!
  • Allow to rest another 2 minutes prior to removing the paper towel.
  • Donezo!
If that works for corn and edamame, I imagined, why not artichokes?  Besides, anything is better than a 45 minute cooking time that yields greenish water and a brownish veggie. 

Artichokes are tasty (especially with butter!) and super-rich in nutrients.  Gluten free foodies need all the nutrition we can get!  One of the biggest problems with Celiac and food intolerance is malnutrition caused by malabsorption.  As discussed in last night's NFCA webinar on Nutrition Beyond the Gluten Free Diet, loading up on whole foods, focusing on nutrition deficiencies, and restoring gut health are immensely important.

The chart below from the California Artichoke Advisory Board provides information on nutrition per 60 grams.  I don't normally post nutrition fact charts, but this has a lot.
 

To microwave an artichoke:
  • Rinse the artichoke.
  • Cut off the stem and any undesired leaves.  (Some folks recommend slicing off the tip and trimming the leaves.)
  • Place in a microwave safe bowl.
  • Wrap in plastic wrap.  It's okay if the edges stick up just a little.  After all, you're wrapping (probably) a round bowl with a rectangular piece of plastic.  Unless you use entirely too much, it's difficult to get everything stuck down.
  • Microwave a large artichoke for 6-8 minutes.  Two take 10 minutes, 4 cook for 15.  (I haven't yet tried the mini artichokes in the microwave, but I've heard that 4 artichokes at about 2 ounces each cook for 10 minutes.)
  • Allow to rest for about 7-10 minutes.
  • Test for doneness by tearing off a leaf.  If it pulls easily, it's done.  If you have to yank to get it off, it is undercooked.  
What if you've never had an artichoke?  No worries!  Here's how to eat it:
  • Tear off a leaf.  
  • Dip in melted - or, even better, clarified - butter.
  • Between your teeth, scrape the leaf to remove the fleshy portion at the base of the leaf.  You don't actually ingest the whole thing. 
  • Discard the leaf.  I like to keep a big bowl nearby.
  • The leaves become more tender as you get closer to the center of the artichoke.
  • You'll reach leaves that appear white in color and may have reddish-purple edges.  You're about to reach the choke - a thistly portion that is not edible.  
  • Remove the choke with a knife or spoon.  Discard.
  • Next is the best part: the heart.  This is a delicacy.  I've heard it called the vegetable equivalent of a lobster.  Cut it up & enjoy!  
I always tell myself I'll get to the heart and save it for a separate recipe, but I never do.  It's a good thing my dad had hogs until I was born.  I'm a little piggy.

Happy eating :)